With lockdown restrictions being eased, the outdoors (except for playgrounds) is being flagged as one of the most ‘socially-distance friendly’ play spaces for children. Creativity and nature go hand-in-hand. This post shares how you can experiment with ‘soil trays’ as a land art activity with kids!
Soil trays are a wonderfully open-ended art activity you can do with young children. The soil itself acts as a ‘blank canvas’ that children arrange natural materials onto. This activity can be done in any natural space including a backyard, a city park, bushland or even at the beach.
Nature in art and early childhood education
Many artists such as Andy Goldsworthy and Georgia O’Keefe have spent their entire careers exploring nature as a creative material. American architect Frank Lloyd Wright also once famously said:
“Nature is my manifestation of God. I go to nature every day for inspiration.”
Goldsworthy’s art is talked about as being a form of ‘land art.’ This is when art is either created directly into the landscape by sculpting the land or when an artist makes structures in the land using natural materials such as rocks or twigs.
Nature has also had an important place in early childhood education ever since Froebel created the first kindergarten. It is interesting to note that the word ‘kindergarten’ literally translates as a garden for children! Frobel intended this to be understood both:
- Metaphorically: As the kindergarten was a place where children could grow and cultivate their education
- Literally: As he believed that nature and the outdoors was an ideal learning place for children
Why are art activities in nature important?
Art activities in nature allow children to creatively engage and interact with aesthetic qualities of the natural world. This is important as it provides a unique sensory-drive learning experience that cannot be replicated indoors. At the same time, natural materials such as leaves, sticks, flowers and dirt can open up new creative thought processes in children. By playing and making in nature, children also have the opportunity to develop a love and respect for the natural world.
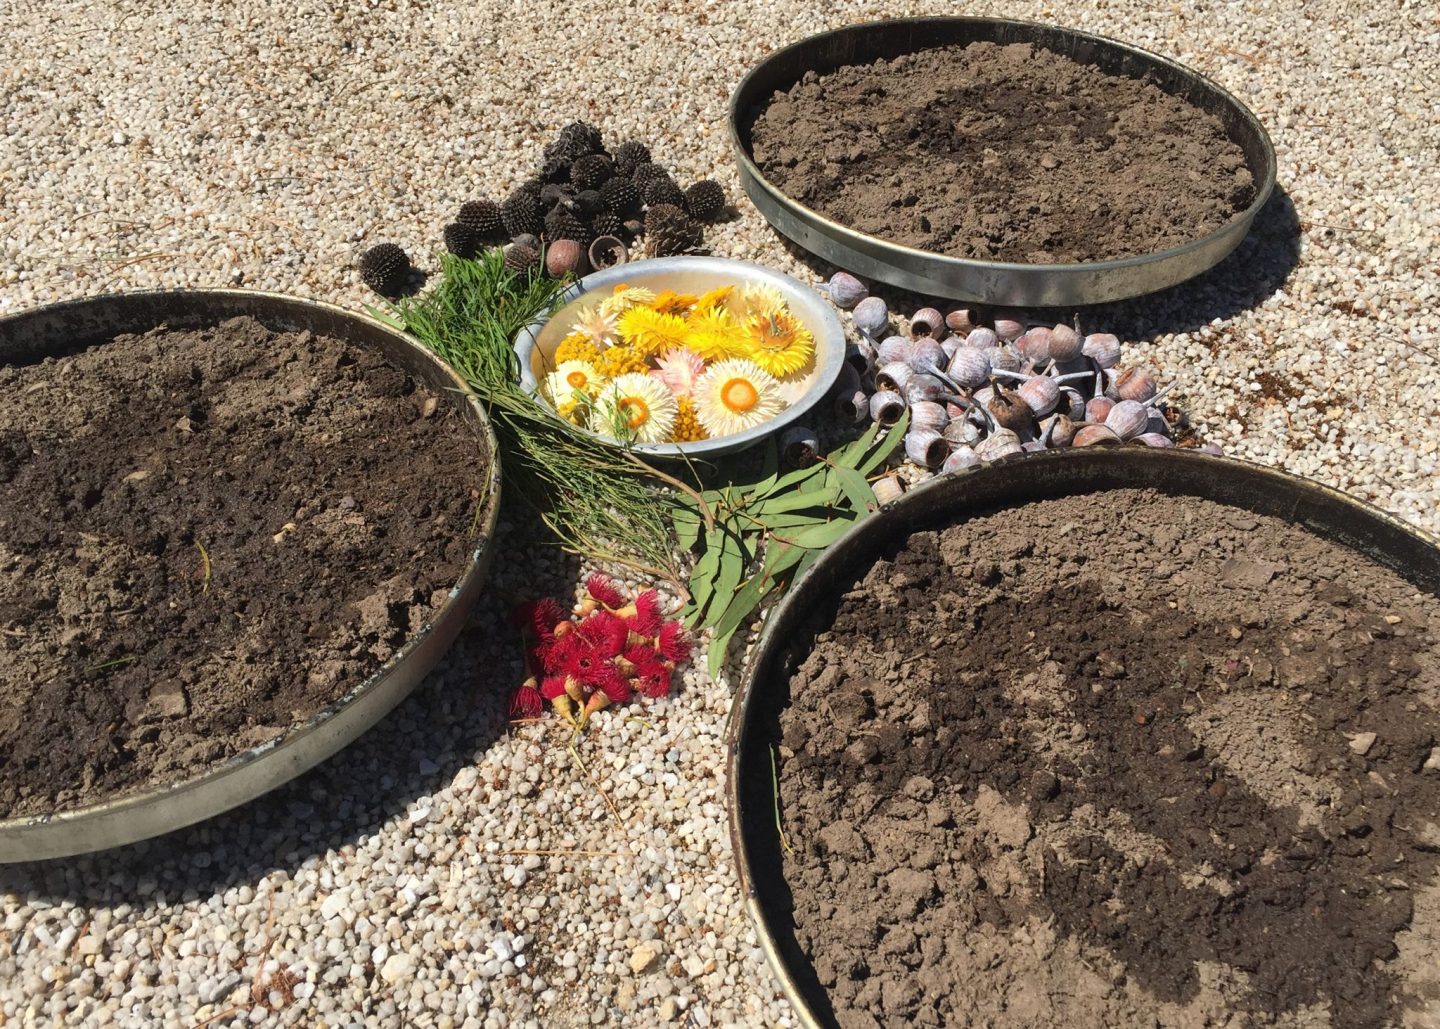
What you need to make a soil tray
1x tray, large plastic plate or clean garbage bin lid
1 x large scoop of soil large enough to fill the tray
1 x water spray bottle
2-3 small plastic containers to collect the natural materials
A handful of small tools for moving and decorating the soil. For example, spoons, paintbrushes, toothbrushes or sculpting utensils.
Step one: Discussing and brainstorming
When I ran this art activity myself, I first gathered the children together and showed them a book of Andy Goldsworthy’s art installation. All children were aged between 2 and 6 years of age. I asked some open-ended questions while doing so such as:
- What does this artwork remind you of?
- What materials has he used to make the artwork?
- Why do you think he leaves the artwork in the forest instead of taking it home?
These questions could be adjusted depending on the age and interests of the child.
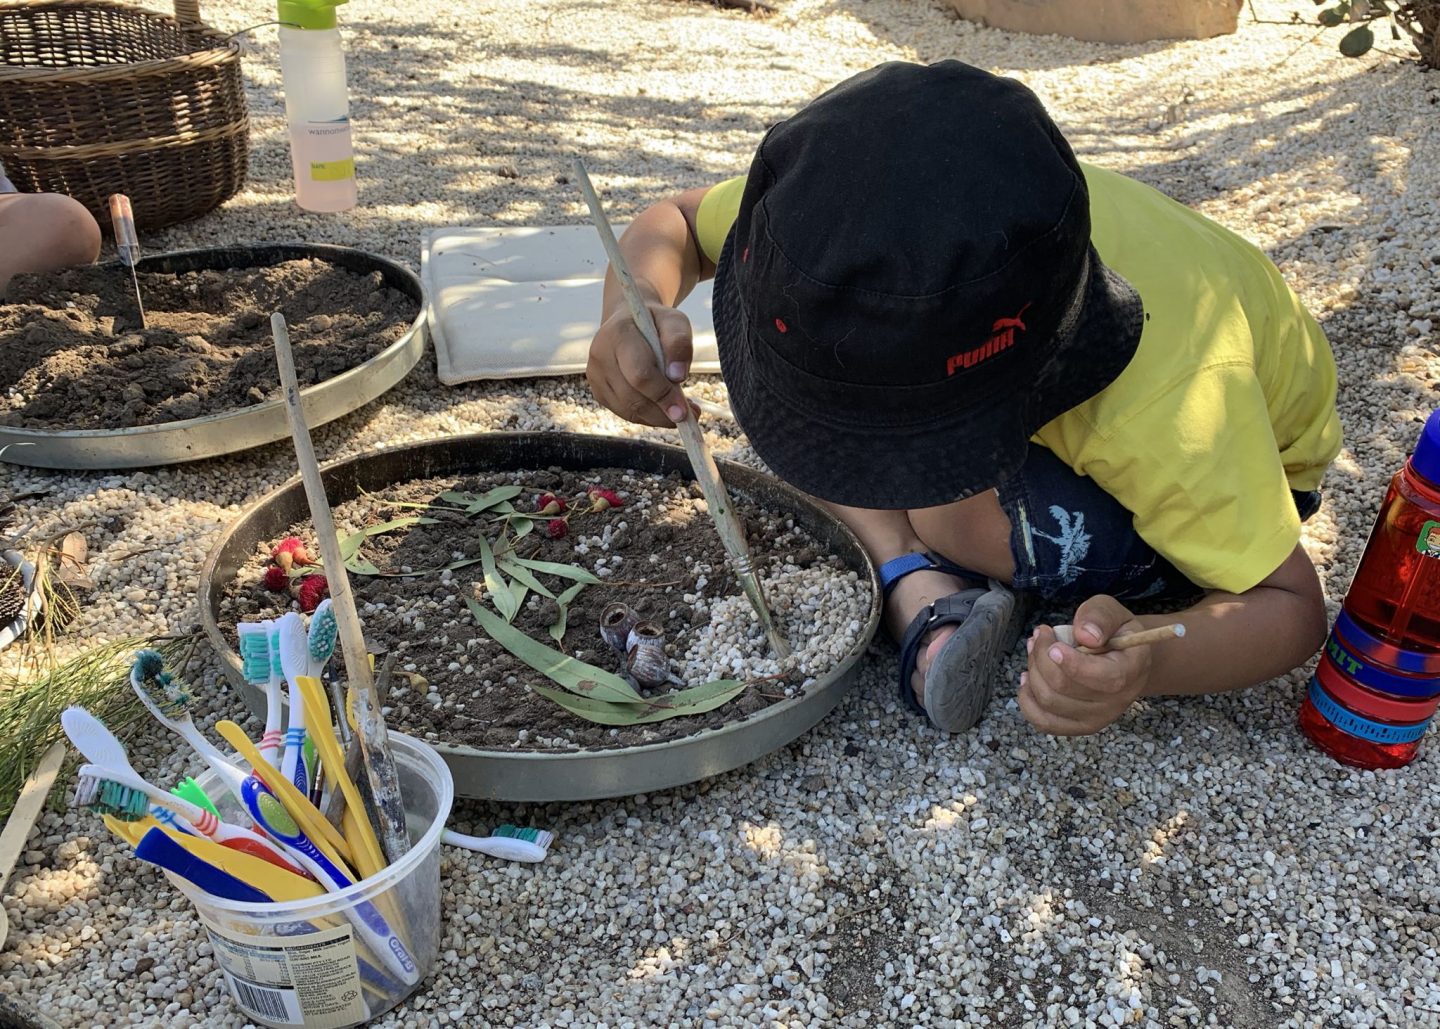
Step two: Exploring the materials
I then introduced the soil trays and explained that we were doing to have a go at making our arrangement using things from the garden. I gave the children wooden baskets and set them the challenge of collecting interesting flowers, nuts and foliage. We decided it was best to try and find natural materials that were already on the ground instead of picking new ones off the plants. The children then began experimenting with the arrangement of the natural materials onto the trays.
Step three: Asking questions and introducing techniques
As the kids were playing, I moved around the group asking questions such as ‘can you tell me about your creation’ and ‘can I help you with anything?’
For some children, I also told them about some different creative techniques. For example, how to use the water spray bottle to dampen the soil and how to create decorate patterns using paint brushes and sticks.
Step four: Sharing and reflecting
Once the kids seemed to be finishing up their artworks and getting a little restless (around 30 minutes), we gathered together in a circle to share what we had made and talk about what we had discovered.
Some children were very verbal in their sharing while others chose to simply hold up their soil tray for others to see. Both modes of communication were totally valid and encouraged.
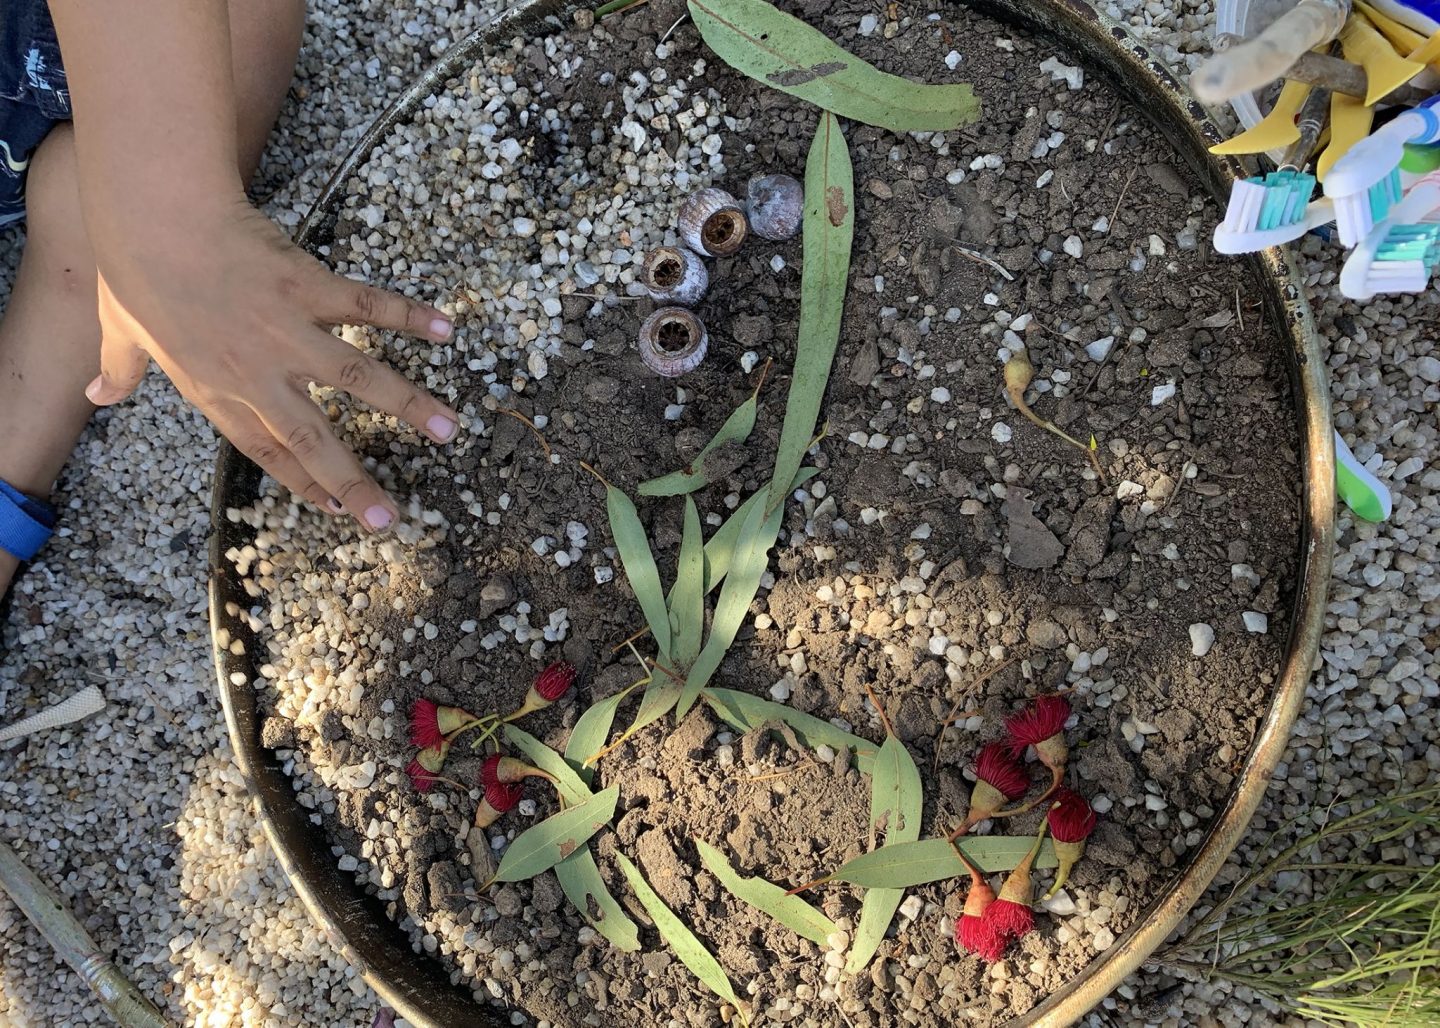
As soil trays are an ephemeral art activities (they don’t last forever). It can also be nice to take photos of children’s experimentation and final artworks.
So, there you go – a step by step guide to doing your own soil tray art activity with young children.
Please feel free to play around with the steps and add in some different ones of your own. For example, you could introduce a couple of Lego men in step three to encourage storytelling.
I would love to see what kids create using the soil trays! If you upload the pics to Instagram, please whack on the hashtag #artplaychildrenlearning so I can cheer you along.
Happy art-making!
Further Links
For more info on Frobel’s philosophy on outdoor play, I highly recommend this booklet on ‘Outdoor play and exploration’ by Helen Tovey
Related posts
Asking questions to encourage children’s creativity! A post for parents
Product and Process Art! A post for parents
Sourcing children’s art materials (on a budget)