Make a Cardboard Assemblage
- Apr 19
- 3 min read
Updated: May 6
Assemblages are artworks made by gathering and constructing different materials and objects which are often scavenged by the artist from unusual places.
What is assemblage?
Assemblages are artworks made by gathering and constructing different materials and objects which are often scavenged by the artist from unusual places. This technique has been used by artists including Louise Nevelson, Robert Rauschenberg, Sarah Lucas, and Rosalie Gascoigne (pictured below).
Assemblages are a great way for children to learn about composition, shape, 3D form, and texture. Young children can also develop their fine motor skills through handling tools such as plastic screws, paper clips, split pins, and scissors. In this post, I share how you can make an assemblage out of recycled cardboard at home!


What you need
A large recycled cardboard box. If possible, source a few different types of cardboard such as correlated, paperboard, and food packaging.
Split pins
MakeDo Cardboard Construction Kit. Purchase HERE
Paper clips
Tape. Masking, painters, and electrical tape are more fibrous and will stick to cardboard easier than masking tape
Cork screw. For poking holes in the cardboard
Plastic cardboard saw. These can be purchased off the MakeDo website
Decorating tools for coloring in the cardboard, such as oil pastels, paints (acrylic or tempera), brushes, or markers. These can be left to the side and introduced to children once they have created some of their design from the cardboard
Additional light-weight materials: Such as light-weight plastic, paper, or fabric that can be used to decorate the assemblage
Additional construction tools: Clothespins, plastic clips, hot glue, white glue, or a hole punch. These can be left to the side and introduced to children in response to their play

Setting up
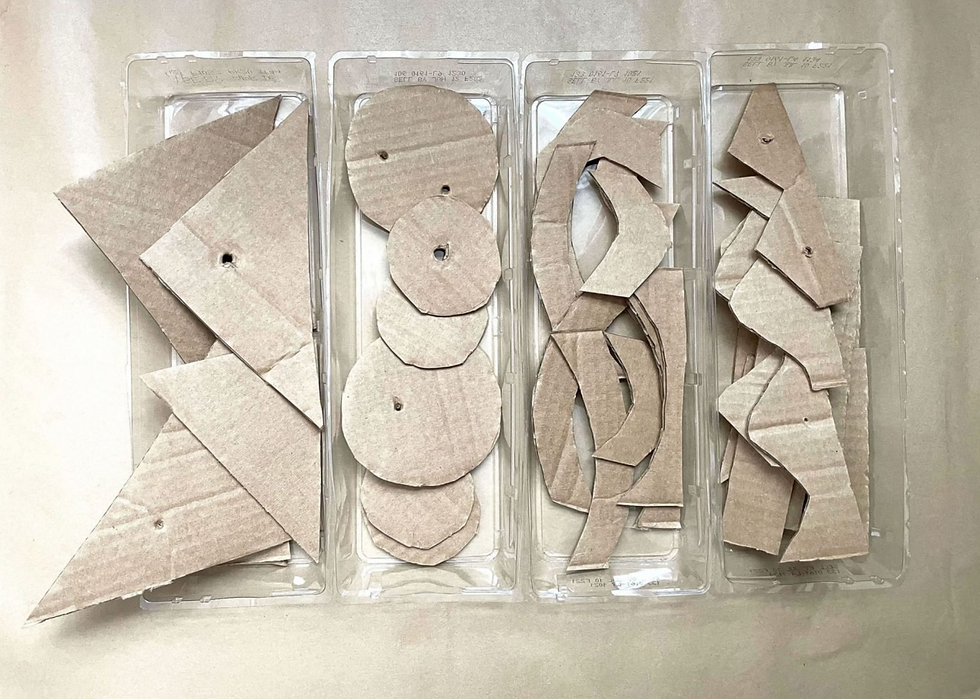
Prepare the cardboard shapes. Pre-cut the cardboard into smaller shapes (pictured below). I chose to do 4 different sets: triangles, circles, waves, and zigzags. For younger children, you may like to pre-poke some holes using the corkscrew or Makedo saw.
Cut the cardboard base shapes. These will be the 'canvases' children construct their assemblage on. I Made mine around 40 x 40 cm.
Lay the materials and tools out. Layout some of the split pins, Make screws, and paper clips. Add in additional materials to the activity, such as clothespins, oil pastels, tape, and hole punches. I personally would hold off using glue so that children need to use their imagination for how they can connect the cardboard in innovative ways.
Prepare for scaffolding: I put the chalk and oil pastels in a small bowl and places off to the side so I could introduce to Anya in response to her play.

Observe and scaffold children's learning
The following prompts, techniques, and vocabulary can be introduced to children to make their learning more complex over time:
Play Prompts
The following open-ended questions can be used to prompt children's play:
Can you make a design out of the cardboard shapes?
Can you arrange the shapes to make a pattern?
What would you like to make out of the cardboard?
Can you name the different shapes?
Art techniques:
Creating compositions, screwing MakeDo tools, using split pins, cutting new shapes, how to use the cardboard saw, attaching, measuring, tipping
Vocabulary:
Arrange, layer, shape, triangle, circle, movement, texture, 3-dimensional, sculpture, and design.

Look at these amazing cardboard assemblages made by students at the UWCSEA international school in Singapore!


Connecting children's cardboard assemblages to contemporary art
Australian-New Zealand artist Rosalie Gascoigne spent her career creating abstract assemblages. These artworks were inspired by the shapes and textures of the Australian landscape and her rural life. She would collect everyday overlooked materials such as discarded wood, feathers, metal, road signs, and wire and create works of art from them. By re-assembling these materials into art, Rosalie would give new life and perspectives to the objects.

Comments