


I am so happy to introduce my new Play Shapes resource for families! This is a free PDF print out that is given to everyone who signs up to the Art Play Children Learning mailing list!
The resources, which was developed with Beam Editions, features 10 pages of funky, colorful shapes that have been inspired by the art of Josef Albers, Bruno Munari, Henri Matisse, and Geta Brătescu.
If you would like a copy, you can sign up to the mailing list here:
[mailerlite_form form_id=1]
The shapes can be printed on either regular printing paper or transparency film. In this post, I share some activity ideas for what you can do with them!
Experimenting with light and shadow
You can use Play Shapes to explore phenomena like light, shadow, opacity and translucency. First, print the shapes onto transparency film and cut them out. You can then add art tools, set challenges and ask open-ended questions like:
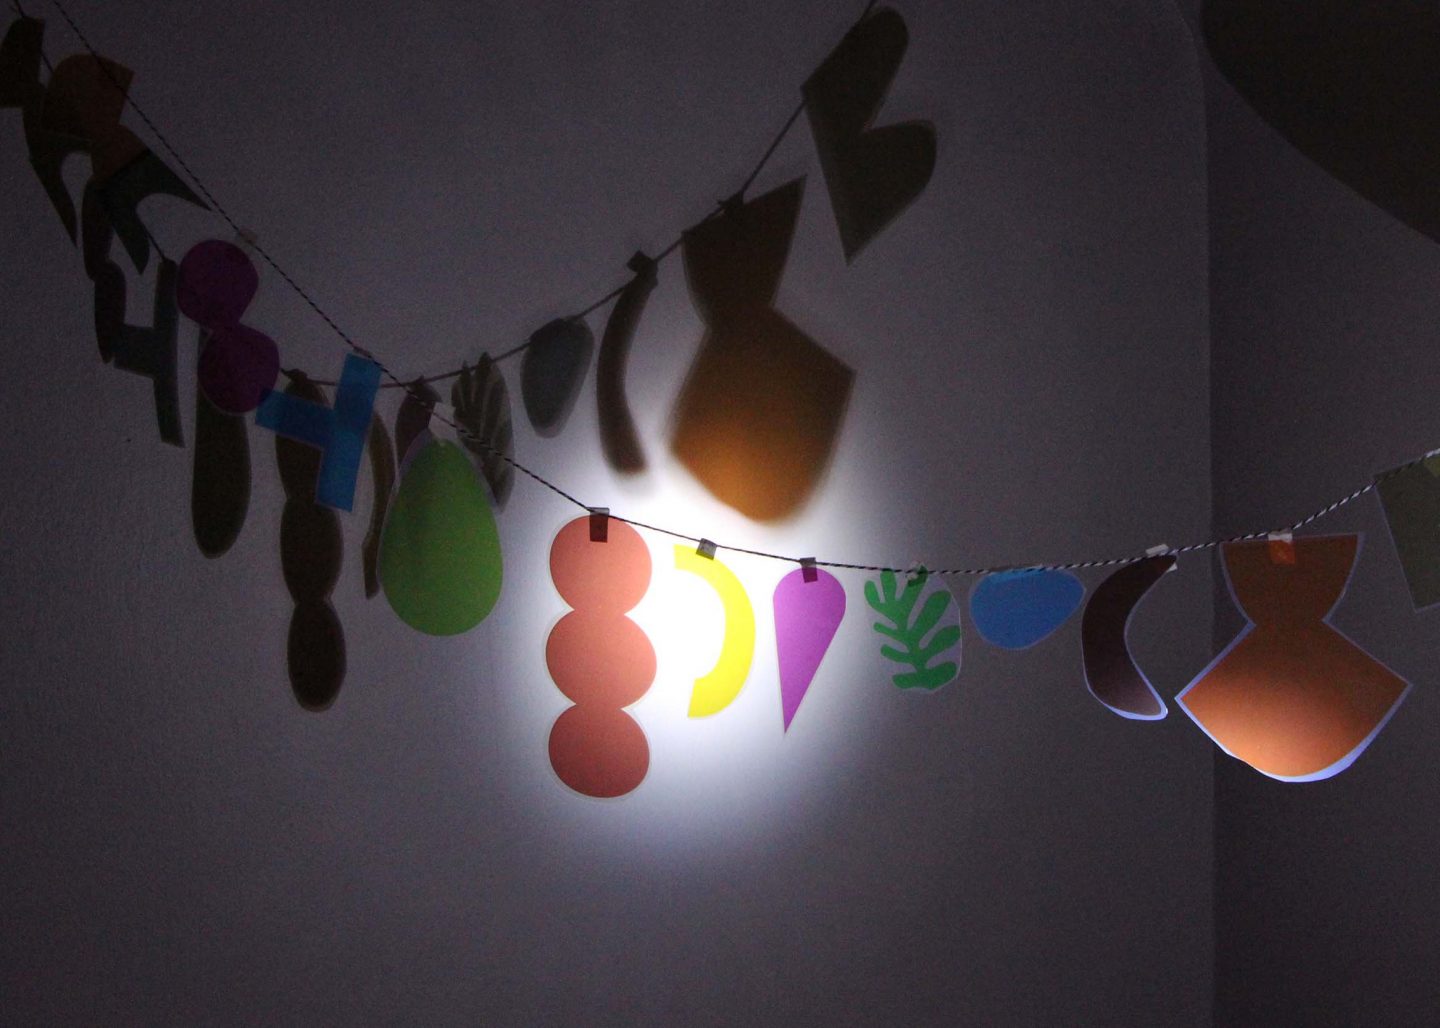
Introduce art tools: like torches, a window, an overhead projector or Lightbox. I set up my space by tying string between two walls and added clothes pins and sticky tape so children could create a colorful light and shadow installation with the materials.
Set challenges: While many kids will start playing without any formal instruction, you can also try setting challenges as a prompt for children. For example, ‘can you make a face, robot, or house using the shapes?’ or ‘Can you layer the colors onto of one another to make new colors?’
Ask inquisitive questions: ‘Why does the light shine through some of the shapes but not others?’
Cutting, pasting and drawing
Children can learn about shape, design, arrangement and pattern by doing cut and paste activities with Play Shapes. To do this, print on regular paper and present alongside scissors, glue, markers and construction tools to get kid’s imagination flowing.

Introduce art tools: like scissors, glue, sticky tape, blu tack, and colored markers (pictured above). You will also need a larger sheet of paper to stick the shapes onto – A4 size will do!
Set challenges: ‘Can you make a pattern out of the shapes?’ ‘Can you make a picture only using warm-colored shapes?
Ask inquisitive questions: like ‘What does this shape look like?’ ‘What you think will happen if we cut this shape in half’ and ‘would you like to tell me about what you are making?’

Make a cardboard sculpture
Children can explore phenomena such as size, form, construction, balance and measurement by creating a cardboard sculpture out of the Play Shapes. To do this, print onto regular paper, cut out the shapes then glue them onto a piece of light-weight cardboard.
I used a recycled cereal box (pictured below). Once dried, you can then cut the shapes out and create 2cm slits on each one. The slit will allow children to slide and stick the shapes together to build a 3D sculpture.

Introduce art tools: such as glue, paint, scissors, pegs, toothpicks and string. You could also put out some larger bits of recycled cardboard that kids can use to make the base of the sculpture with.

Set challenges: For example, ‘can you make a house, hat or diorama?’
Ask inquisitive questions: ‘Let me know if I can help you with anything?’ ‘What was the trickiest part of making your sculpture?’ ‘

Let me know if you have a go at any of these activities.
And if you upload any pics to Instagram, you can add the hashtag #artplaychildrenlearning so I can cheer you on.
Happy making!
Louisa x
Posts relating to Play Shapes
Free printable quotes on art and education
Tips for supporting children’s creativity at home! A post for parents
Creativity and multiculturalism in children’s learning – an interview with artist Lorna Rose.

